Essential TLS Certificate Commands Every Developer Should Know
Written on
Chapter 1: Introduction to TLS Certificates
Navigating the complexities of Public Key Infrastructure (PKI) can be daunting for software developers. While creating applications can be enjoyable, securing their communication is a critical challenge. If you're working on distributed systems that interact over a network, you'll inevitably encounter TLS certificates.
In this article, we will tackle the intricacies of certificate management. By mastering a few essential commands for generating and inspecting certificates, you'll find it much easier to manage and secure your applications. We will also explore how to set up a private certificate chain for testing purposes and understand how each element integrates into the broader system.

Generating a Self-Signed Certificate
Creating a self-signed certificate is one of the most frequent tasks in the realm of certificates. If you're developing an encrypted network or setting up an HTTPS server for testing, obtaining a certificate is essential.
The quickest and most straightforward method is to generate a “self-signed” certificate. This type of certificate asserts, “I am the only authority and I validate my own identity.”
However, it’s important to recognize that a self-signed certificate is not secure or trusted since it lacks an external certificate authority to validate its authenticity. For genuine, trusted certificates, consider using free services like Let’s Encrypt or purchasing one from providers like DigiCert.
For internal development or testing environments, a self-signed certificate is usually acceptable. Let’s explore how to create one using the OpenSSL utility:
openssl req -new
-newkey rsa:4096 -nodes
-x509
-days 3650
-keyout self_signed.key
-out self_signed.pem
-subj '/CN=TestCertificate/C=US/ST=CA/L=SF/O=Test'
We’ll break down this command step-by-step:
- Create a new certificate request in PKCS10 format.
- Generate a new private key for this request, 4096 bytes in length.
- Avoid encrypting the private key with a password.
- Produce a self-signed certificate using the -x509 flag.
- Set the certificate to expire in 10 years (a longer duration is common for offline root CAs).
- Save the private key to self_signed.key.
- Write the certificate to self_signed.pem.
- Include subject information, such as country, state, and organization.
After executing this command, you will have two crucial files:
- A .key file, which is the private key for the certificate, similar to an SSH key.
- A .pem file, which contains the certificate itself. With both files, you can install the certificate into any services requiring encryption.
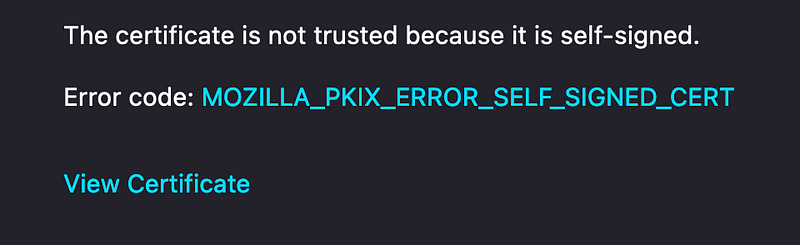
Be aware that clients connecting to your service will likely encounter warnings about the self-signed certificate. Although it isn't trusted, the communication between the service will still be encrypted.
Next, let’s see how to use our newly created self-signed certificate to sign other types of certificates.
Generating a Certificate Signing Request (CSR)
Now that we have a self-signed certificate, we can use it to act as a Certificate Authority (CA) and sign additional certificates. This process establishes a chain of trust among certificates, forming the foundation of distributed PKI.
Suppose you have a new host that requires a certificate. All hosts within the same domain should trust each other, and the CA serves as a central reference point. We can generate unique certificates for each host and sign them with a single CA.
To sign a host certificate, we first need to create a Certificate Signing Request (CSR). This request, generated by the host, is sent to the CA for signing.
Let’s create a CSR for our TestHost:
openssl req -new
-newkey rsa:4096 -nodes
-keyout host.key
-out host.csr
-subj '/CN=TestHost/C=US/ST=CA/L=SF/O=Test'
Here's a breakdown of the command:
- Create a new certificate request in PKCS10 format.
- Generate a new, unencrypted private key for this request, also 4096 bytes.
- Save the private key to host.key.
- Output the CSR to host.csr.
- Include the relevant subject information.
After running this command, you will have a CSR file ready to be signed by your CA. Let’s proceed to sign the CSR.
Signing the CSR
The final step involves signing the CSR. For this, we will take the host.csr file created earlier and submit it to the CA, which could be on a centralized server or a portal. In our case, we’ll sign it locally:
openssl x509 -req
-in host.csr
-CA self_signed.pem
-CAkey self_signed.key
-CAcreateserial
-out host.pem
-days 30 -sha256
Let’s break down this command:
- We are performing an x509 request to sign a certificate rather than create a new one.
- Provide the CSR as input.
- Use the self-signed CA certificate.
- Use the self-signed CA private key.
- Create a serial number file to avoid errors during signing.
- Output the signed certificate as host.pem.
- Set the certificate validity to 30 days, signed with SHA256.
After executing this command, you will have your final signed host certificate. You can use this certificate, along with others signed by the same CA, to build a network of trusted hosts within your domain.
It's important to note that host certificates typically have shorter expiration times. Most recommendations suggest around 30 days, ensuring regular renewals and preventing long-term validity for ephemeral hosts.
Inspecting Certificates
As you accumulate various certificates, it's wise to learn how to inspect them. Different certificates may have varying expiration durations. While an offline root CA can be valid for a decade, client certificates may only last 24 hours.
Let's use another OpenSSL command to inspect existing certificates:
openssl x509 -text -noout < cert.pem
This command provides a wealth of information, including:
- The issuer
- The expiration date
- Subject details
- Encryption information
While there’s additional data, such as encrypted keys and cipher information, those are typically less useful for troubleshooting.
If you need to check when a certificate expires or who issued it, this command is an excellent starting point. Here’s an example output from our self-signed certificate:
Certificate:
Data:
Version: 1 (0x0)
Serial Number: 15449774297344832821 (0xd6689fddf532f535)
Signature Algorithm: sha256WithRSAEncryption
Issuer: CN=TestCertificate, C=US, ST=CA, L=SF, O=Test
Validity
Not Before: Sep 21 01:48:35 2022 GMT
Not After : Sep 18 01:48:35 2032 GMT
Subject: CN=TestCertificate, C=US, ST=CA, L=SF, O=Test
This output quickly informs us about the certificate's validity period, origin, and intended recipient.
Thank you for reading! If you found this article helpful, please follow and subscribe for more updates. Interested in more topics? Check out these additional articles:
- A Simple Way To Make RPCs With Python
- Python Modules That Make Handling JSON Even Faster
Chapter 2: Video Resources
Tech Talk: Demystifying TLS Certificates
This video provides an in-depth explanation of TLS certificates and their importance in securing communications in software development.
How to Create a Valid Self-Signed SSL Certificate?
Learn step-by-step how to create a valid self-signed SSL certificate for testing and development purposes.